


Which properties were the same (common) for all the solids you investigated?
Fixed shape, dry, hard
Everything around us is made up of matter. All solids, liquids and gases in the universe are matter. Matter takes up space and has mass, this means we can weigh matter. When we use one kind of matter to make something such as a wooden or plastic chair we say the material used was wood or plastic.
When you introduce the learners to the strand: Matter and Materials, explain to them that everything around us is built up of matter. When we use matter to make something we usually call it a material.
Introduce this section with a practical demonstration. Use examples of materials and substances to sort matter as solids, liquids and gases.
You will need the following materials: wood, stone, plastic, a glass of water, another container to pour the water in, juice, tea, air (in two or three different shaped balloons or tyres), cooking oil, cooking gas, a boiling kettle etc.
Introduce the learners to the examples. Let them observe, feel, smell and touch the examples. Let the learners engage in the activity to identify solids, liquids and gases.
Explain to the learners the meaning of the word: property. Some learners know a "property" is a thing owned by someone as a piece of land or house. In science, the word "property" describes a special quality or characteristic of something. Properties are common when the same qualities belong to most substances in the group studied.
Explain to the class what they have to do in the activity: "Exploring the properties of solids". Let the learners work in pairs. They must do the activity and write down their findings. Assist them to draw a concept map. Follow-up with a class discussion to make sure that everyone knows what the common properties of solids are.
Materials are all around us. Some materials are solids, some are liquids and some are gases. A material will always be one of these three things. But what exactly are solids, liquids and gases?!
Let's investigate the properties of solids, liquids and gases!
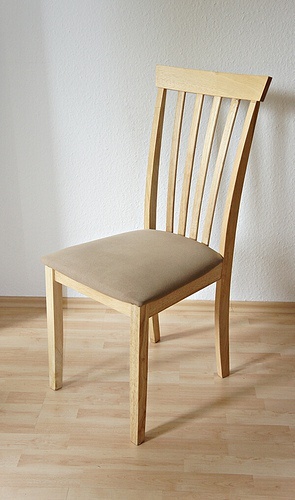
The word "property" has different meanings. We say this house is the property of Mr Mabusa (he is the owner of the house). When we use the word "property" in science we look at what makes that kind of matter special; how does it behave differently from other kinds of matter. For example when you shift a chair to another place, it will still have the same shape. This is because the chair is solid. So we can say that all solids keep their shape. We say that keeping its shape is a property of a solid. Let's look at some of the properties of solids.
MATERIALS (What you will need):
INSTRUCTIONS (What you have to do):
Work in pairs.
|
Object |
Your observations |
|
Stone |
|
|
Cloth |
|
|
Paper |
|
|
Atable or chair |
|
QUESTIONS:
Which properties were the same (common) for all the solids you investigated?
Fixed shape, dry, hard
List some other solid objects in your classroom. Give at least 4 examples.
Table, door, ruler, pencil, rubber, desk, etc
So, we have learned that a substance in a solid form will have a fixed shape and takes up a definite space. Let's now look at liquids.
What is a liquid?
There are liquids all around you and you use them in your everyday lives. Some examples are water, paraffin, baby oil, fruit juice, petrol or methylated spirits. What are the common properties of liquids?
When a scientist wants to know more about something they set up questions and then they try to answer the questions by doing experiments.
What you have to do before presenting the lesson:
Collect the materials needed for the practical before you do the activity. You can ask the learners to bring some of the materials to school, but be prepared to supply the materials as learners sometimes do not have the resources or forget to bring them to school and then you are stuck. Take care that you have soap, water, a basin and paper towels for learners to wash their hands after doing the practical.
How to present the lesson:
Pour about 2 tablespoons of the suggested liquid in a container. Divide the class into 5 groups. Give each group a different liquid, a saucer and another container. Go through the activity with the learners and explain to them what they have to do. Discuss the safety rules and warn the learners NEVER to taste an unknown liquid - methylated spirits and paraffin are poisonous. Walk to each group and help the groups that are not sure what to do. Let the learners wash their hands after doing the practical. Go through the concept maps of the groups in a class discussion to make sure that everyone knows how to draw a concept map. Let the learners on their own do the questions in their workbooks. Go through the answers with the class.
MATERIALS (What you will need):
INSTRUCTIONS (What you have to do):
|
Observation |
Answer |
|
What did your liquid smell like? |
|
|
Was your hand dry or wet after touching the liquid? |
|
|
Did the shape of the liquid change when you poured it into another container? |
|
|
What do you think happened to the liquid when you left it in a warm place? |
QUESTIONS:
Write down the safety rules for this investigation. Why must these safety rules be followed?
Don't taste any unknown liquid, wash your hands after handling unknown liquid, as they can be poisonous.
Write down those properties that were the same (common) for all the liquids investigated.
Liquids: they flow and can be poured, shape is not fixed and they take the shape of the container.
After doing this activity where we investigated the properties of liquids, we can say that a liquid:
This is different to a solid. Remember a solid has a fixed shape and you cannot pour a solid!
Do you remember in the first term when we spoke about breathing as one of the seven life processes of living things? When we breathe, we are taking in and giving out gases. But we cannot see the gas!
Gases are a bit more difficult to understand as we usually cannot see gases. We can see places where gases are used and the containers that a gas is kept in.
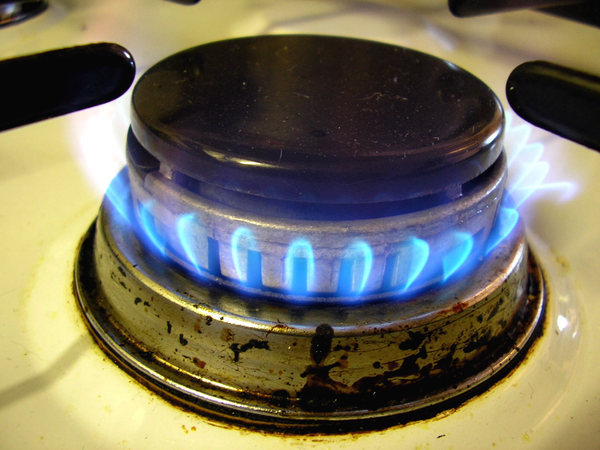
Can you name any gases? What about the gas used in a stove to cook food? Have you seen the gas coming out of the exhaust of a motor car? In hospitals, there are cylinders filled with oxygen gas for patients with breathing problems. The air you breathe in has oxygen gas. The air you breathe out has more carbon dioxide gas.
Look at the following pictures of where a gas is being used.

INSTRUCTIONS:
|
Property illustrated |
 |
 |
 |
|
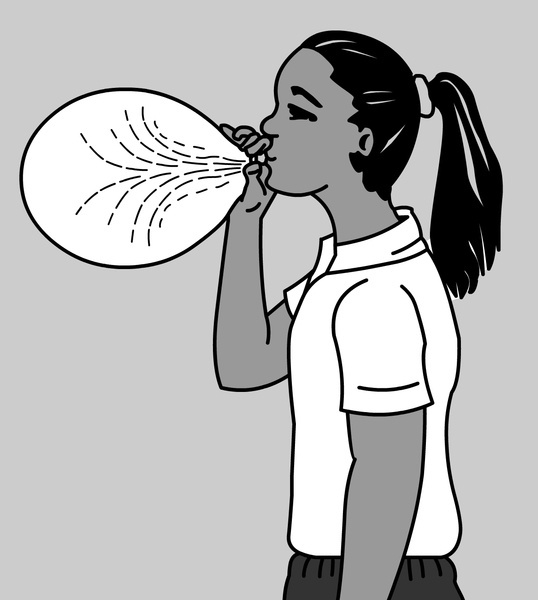
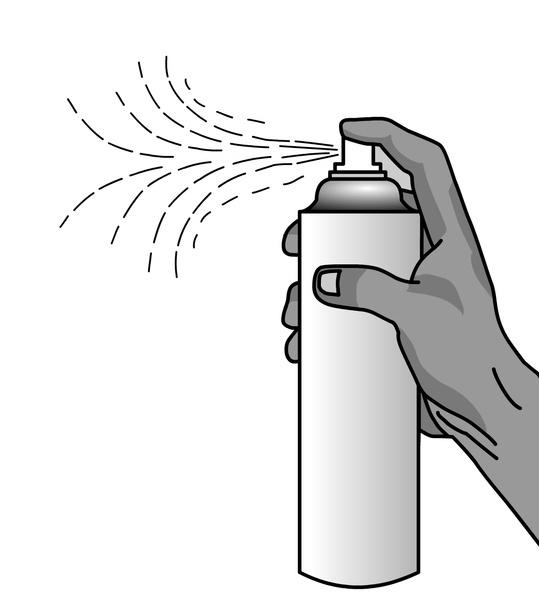
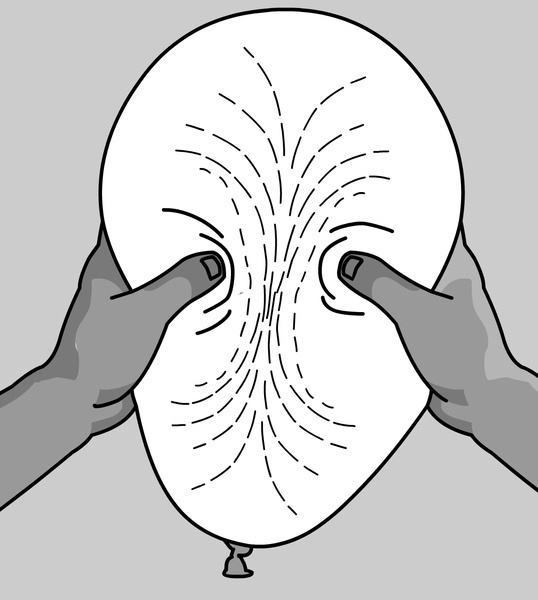
Agas moves without something that pushes it - it diffuses through the air. |
tick |
||
|
Agas has no definite shape and fills the container it is in. |
tick |
||
|
Agas can be pressed to fill a smaller space. |
tick |
The states of matter are solids, liquids and gases. We have carefully investigated these three states of matter.
Here is a summary:
|
Solids |
Liquids |
Gases |
|
Have a definite shape |
Have no definite shape |
Have no definite shape |
|
Takes up a definite space |
Takes up a definite space |
Takes up all the space available |
|
Do not flow |
Can flow |
Can flow |
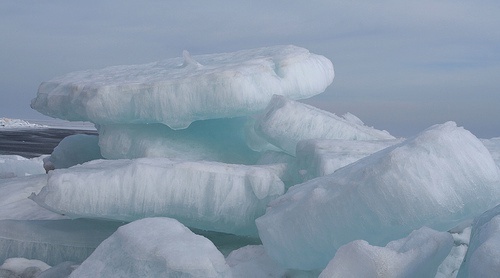
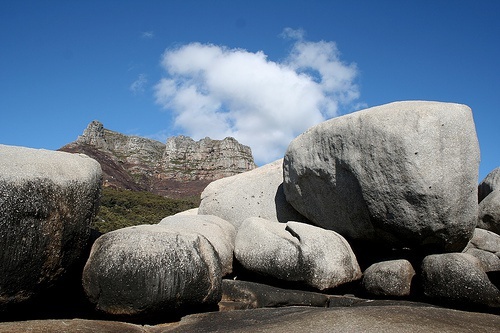 Big boulders of rock are solids. |
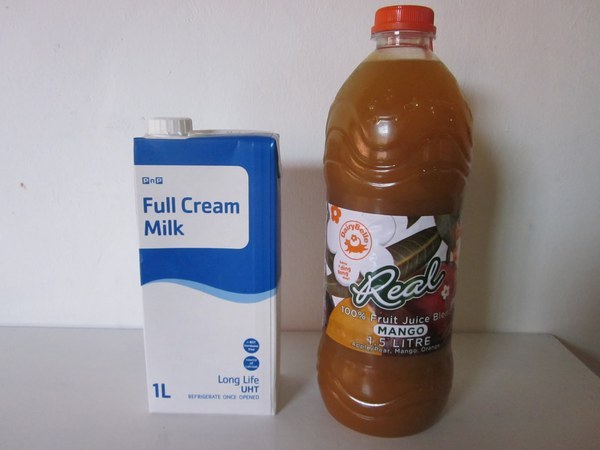 Milk and orange juice are liquids. |
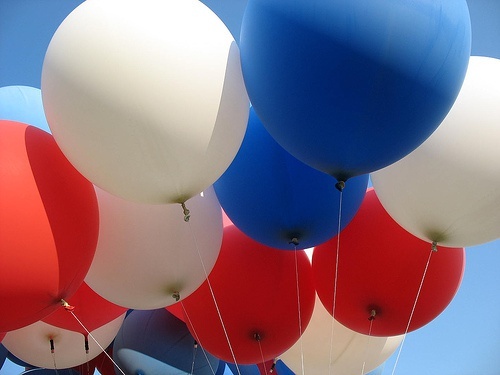
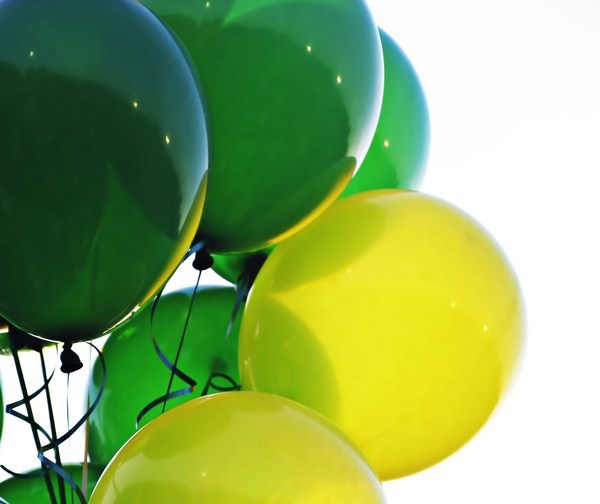 These balloons are filled with helium gas. |
On the front cover for this term for Matter and Materials, you will see the Thunderbolt kids are at a construction site for a soccer stadium. Can you see that Sophie is carrying a tray of refreshments for all of them? On her tray, there are refreshments in the different states of matter. Identify what state of matter each refreshment is.
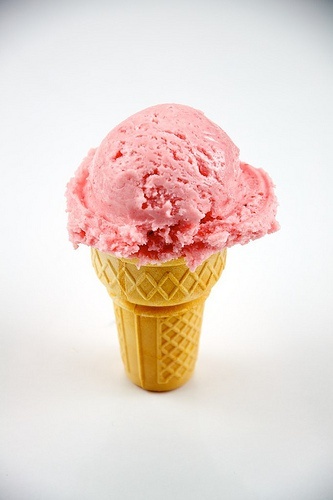
Ice cream: solid
Juice: liquid
Steam from tea: gas
Ice in water: solid
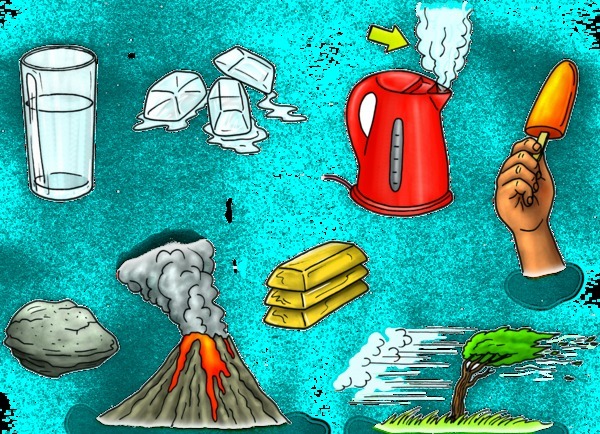
In the next activity, we are going to study examples of different substances and sort them as solids, liquids or gases.
INSTRUCTIONS :
|
Substance |
Solid |
Liquid |
Gas |
|
Glass of water |
|||
|
Ice blocks |
|||
|
Steam from kettle |
|||
|
Rock |
|||
|
Lava from volcano |
|||
|
Gold bars |
|||
|
Wind |
Remember that we spoke about the states of matter? These were solids liquids and gases. A substance can change from one state to another. For example, a solid can change into a liquid.
For example, water can be a liquid in your glass or turn into ice in the freezer. Ice is a solid. But what makes these substances change from one state to another?
We know that matter can be in the solid, liquid or gas state. Let's use water as an example.
If you place tap water into an ice tray and put this in the freezer, what will happen to the water?
It freezes.
If you now take ice cubes and place them in the sun, what happens to the ice cubes?
They melt.
The difference between a freezer and the Sun outside is that one is hot and the other is cold. If we place the water in a place that is cold enough, it l freezes. If we place the ice cubes in a hot place, they melt.
This is because the state of matter can be changed from one to another by adding or removing heat.
Let's read a story to try understand this a bit more.
For the next activity, the aim is to increase reading and writing skills in learners while still focusing on a science concept. The idea of a state change (melting) is explained using a story. The story can be read out by the teacher in the class and then learners can get together in groups and read the story again together and answer the questions that follow.
INSTRUCTIONS :
Mashadu is a boy in Grade 1 at a primary school in a small village which gets very hot in summer. He loves to play soccer. After school he often goes over to The Thunderbolt School of Learning to play with the Thunderbolt Kids. They really like having Mashadu to play with them even though he is a few years younger, because he is very talented and also fun and caring. Mashadu especially likes Jojo and they play well together as a team.
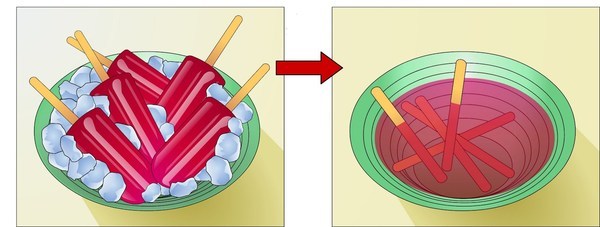
One day after school, Mashadu thought he would do something nice for his friends, the Thunderbolt Kids and surprise them with ice lollies for when they were finished playing. Mashadu bought 5 ice lollies, one for himself and one for each of the Thunderbolt Kids. He put the ice lollies in a bowl and placed some ice blocks around them to keep them cool. Mashadu then ran off to join the others playing soccer.
After the game, Mashadu ran back to the bowl to get the ice lollies. But he got such a shock when he got there. They were all gone! He was so upset and started to cry. The Thunderbolt Kids saw the Mashadu was upset and ran over to see what was wrong.
"Hey Mashadu, what's wrong?! Did you hurt yourself while playing?" Jojo asked.
"No, I didn't. I bought some ice lollies for all of you as a surprise and when I came back now to get them they were all gone! I think someone stole and ate them and just left the sticks! Look!" Mashadu cried out.
"Oh no, don't cry Mashadu! It's not your fault, and no one stole them or ate them either," Farrah said while rubbing Mashadu on the back.
"Yes, Mashadu, actually we learnt in class today about what happened to your ice lollies," said Sophie, "and I can explain it to you too. Do you see that your bowl is actually not empty? There is a liquid in it. And it also has a red colour, which was the colour of your ice lollies."
"Yes, I see that," answered Mashadu, "but then how did that happen?"
Tom then answered, "Your ice lollies melted from the heat from the air around us. Even if the sun was not so hot, they would have melted! For something to stay frozen it needs to be at a very cold temperature, like in a freezer."
"Yes, melting is when heat causes the solid ice lollies to change into a liquid," Sophie replied, "So no one stole the ice lollies, they just melted."
"Oh ok, I see," said Mashadu, "I must be really silly not to know that!"
"No, not at all Mashadu! We only learned about it today in class and we are in Grade 4!" laughed Farrah.
"I know what we should do!" shouted Jojo, "Let's go to the tuckshop right now. I have some extra change and we can buy some more frozen ice lollies!"
They all really liked this idea, especially Mashadu who was now laughing. So off they all went, the Thunderbolt Kids and Mashadu, and bought some more ice lollies and sat under the tree to eat them.
QUESTIONS:
What is the name of the main character in the story?
Mashadu
What grade is he in?
Grade 1
What grade are the Thunderbolt Kids in?
Grade 4
What game are the children playing together after school?
Soccer
When the ice lollies are frozen, are they a solid, liquid or a gas?
Solid
Explain in your own words what happened to the ice and the ice lollies while they were left in the sun.
Heat from the sun causes a state change and the ice lollies melt from a solid to a liquid.
What is the name given to this process?
Melting
Do you think you can reverse the process of melting? How would you do this?
Yes, you can freeze the liquid so that it becomes ice again, but it would not be in the same shape as the ice lollies.
What is your favourite type of ice cream or ice lolly?
Learner-dependent answer
If you wanted to do something nice for your friends, what would you do?
Learner-dependent answer
So what have we learned from Mashadu's experience with the ice lollies? The ice lollies were frozen and cold. When they were placed in the sun, they started to warm up. This heat caused a state change to take place. The ice changed to a liquid. This is called melting.
When Mashadu and the Thunderbolt Kids went to get new ice lollies from the tuckshop, these ice lollies were frozen, but they were made from a liquid. The liquid was poured into the shape of an ice lolly and then they were cooled. As heat was removed, they froze. When a liquid changes to a solid, this is called solidifying.
Now that we have read about Mashadu and his experience of changes of state, let's do some practical demonstrations in class to learn more.
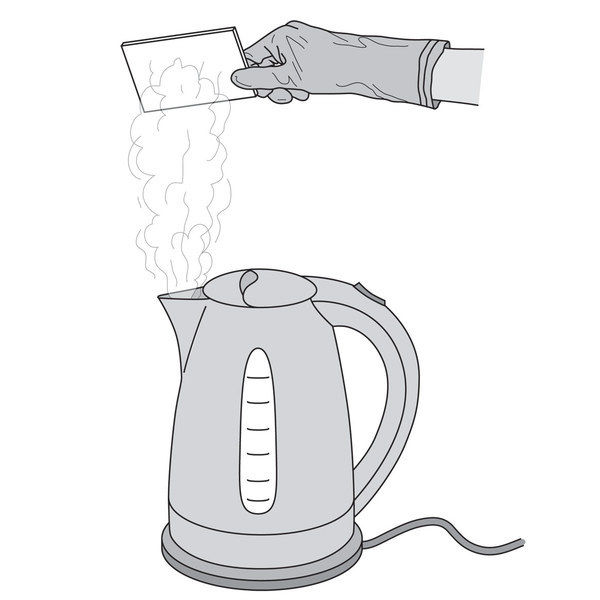
The following activity is to be done as a demonstration in the front of the class. Invite learners up to your desk in small groups to see the water boiling and to observe the steam as it hits the mirror and condenses. You need to explain both processes that are taking place. Firstly, heat is added to the water and it boils, changing from a liquid to a gas. When the gas hits the mirror, which is cold, it cools down and condenses to form a liquid again on the mirror. This also shows that changes of state are reversible. Later on, refer back to this activity when dealing with reversible state changes.
MATERIALS (What you will need)
INSTRUCTIONS (What you have to do):
There is often a misconception between boiling and evaporation. Water does not need to boil in order to evaporate. Even cold water can evaporate at room temperature. Be careful not to introduce this misconception in this activity. Rather, what it is showing is condensation. Even the steam is not visible coming out of the kettle. The steam is actually just at the spout when it first comes out and is extremely hot. The "cloud" that you see forming is actually when the steam has already started to cool and condense and form water, but in tiny droplets which are visible. This is not a gas but actually tiny droplets of water in the air. The use of the mirror is to help speed up the process of condensation and show what is happening. This activity shows boiling and condensation, not evaporation.
QUESTIONS:
What was the change of state when the water boiled and became steam?
Water to gas
Evaporation takes place when heat is added to the liquid. It means the water changes from the liquid to the gas state.

The steam that comes out of the kettle is extremely hot and you cannot see it. The steam quickly cools and forms tiny droplets in the air. These tiny droplets are visible and form the "cloud" that you see. When these tiny droplets hit the mirror they cool more and form the bigger droplets which you see forming on the mirror. We say the steam condensed to form water. The change of state from the gas state to the liquid state is called condensation, which takes place when heat is removed.
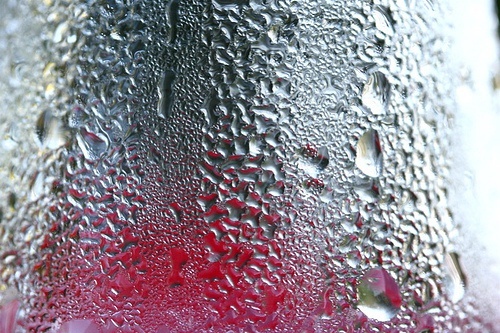
When you leave a glass filled with cold water on the table, small droplets form on the outside. This is because there is water vapour in the air which cools down when it is near the cold glass. The water vapour in the air around the glass condenses as it changes from a gas to a liquid and forms the tiny droplets you can see.
We now know that substances react to temperature changes around them. But where do we use what we learned in everyday life? Let us look at how milk reacts to low temperature.
The following activity can be done using the video to watch how ice cream is made. If you do not have access to watch the video, then follow the instructions to make the ice cream. The teacher can make the ice cream in the front of the class and then put it in a freezer at the school for the night.
MATERIALS (what you will need):
INSTRUCTIONS:
QUESTIONS:
|
Ingredients |
Before |
After |
|
Bananas |
||
|
Fresh cream |
||
|
Milk |
||
|
Vanilla essence |
||
|
Sugar |
What do we call the process for when a liquid changes to a solid?
Solidifying
Which ingredients changed state during the process?
Cream, milk and vanilla essence
For the following activity, either do it as a demonstration or allow learners to work in groups. Make sure that you walk around the class and pay special attention to when the learners are working with the candle so that they do not burn themselves.
MATERIALS (What each group will need):
INSTRUCTIONS (What you have to do in your group):
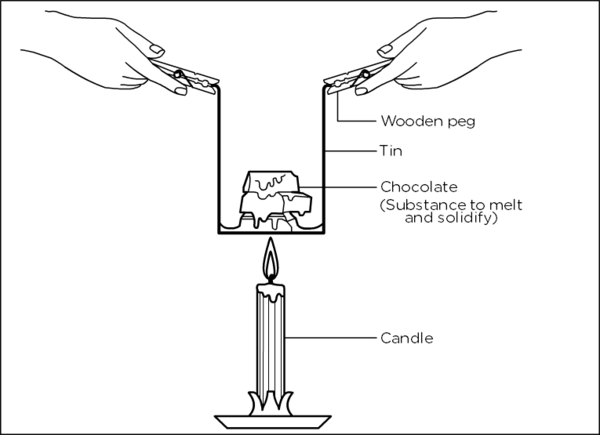
OBSERVATIONS:
|
Substance |
Observation before heating |
What happened after heating |
What happened after cooling |
|
Butter/margarine |
|||
|
Chocolate/wax |
|||
|
Ice blocks/ice cream |
QUESTIONS:
What happened when the solids were heated by the candle?
They melted.
What happened to the substances when they cooled down again?
They solidified.
Did the ice cream solidify again or did it remain a liquid?
No, ice cream should not have solidified again if it was not placed back in the freezer.
Explain to the learners that the ice cream needs to be at a colder temperature than the butter or chocolate in order to solidify. This is because it has a different freezing temperature.
We have seen that solids that have melted can be solidified again. So the process can be reversed or turned around again by adding or removing heat.
Reversibility is a difficult concept that even high school learners battle with. It is a process that can go in either direction depending on (in this case) whether energy is added or removed. But, energy is only done in term 3. So, at this stage it is only necessary for learners to know that the process can be turned around and one can explain that by saying heat is added and heat is removed. This should be in their frame of reference.
Let's revise what we have learned from the story of Mashadu and the activities. We have learned some new big words which may be quite confusing!
Here is a summary of the different state changes:
|
Change of state |
Heating or cooling? |
We call the process |
|
Solid to a liquid |
Heating |
Melting |
|
Liquid to a gas |
Heating |
Evaporating |
|
Gas to a liquid |
Cooling |
Condensing |
|
Liquid to a solid |
Cooling |
Freezing or solidifying |
Freezing is actually only a type of solidification and requires specific conditions, zero degrees Celsius.
Temperature
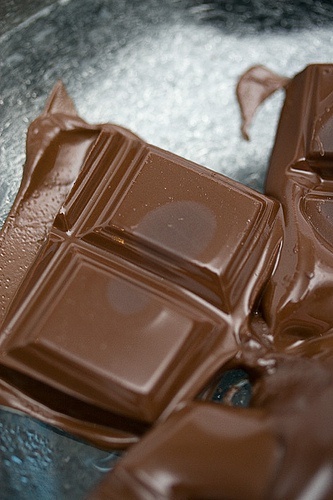
In the previous activity, you saw that you were able to melt and solidify different substances. But, some of these substances may have taken longer to melt than others. The ice cream probably melted very quickly, but the chocolate took longer.
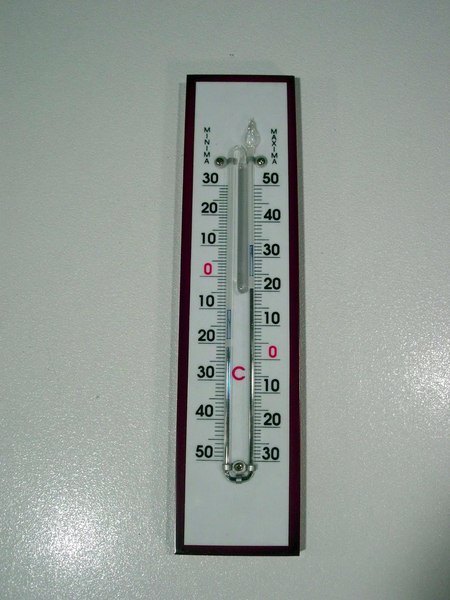
We have discovered that some substances melt very easy, while others need to be heated a while. Each substance starts melting at a certain temperature. This is called the melting point of a substance. Temperature is measured in degrees Celsius (oC) with an instrument called a thermometer.
Drawing graphs is a very important skill in science. This may be the first time that learners are learning about drawing graphs. You need to explain that graphs help to show information in a different way to plain text. They help to present a lot of data in an easy way to read. The next activity should be done as a class in a step by step way. Explain that the substance will go at the bottom (the x-axis) and the temperature will go on the left axis (y-axis). Possibly draw the graph on the board as a group activity and get the learners to copy it into their books. Choose an easy scale for the y-axis, such as 10.
INSTRUCTIONS:
|
Substance |
Melting point in degrees celsius (oC) |
|
ice |
0 |
|
chocolate |
32 |
|
wax |
62 |
QUESTIONS:
Look at your graph and decide which substance melts at the lowest temperature.
Ice
Which substance melts at the highest temperature?
Wax
What is the name of the process when solid wax turns into a liquid?
Melting
What do you need to do to change liquid gas into a solid again?
Cool it down
What process is the reverse of melting?
Solidifying
People say the Earth is the blue planet, because much of its surface is covered in water and the land forms a small part.
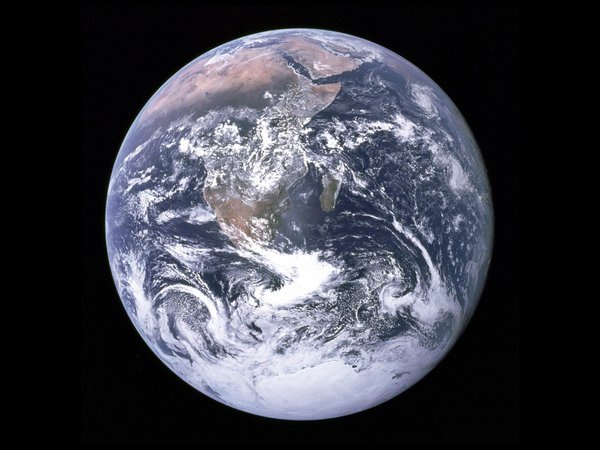
Did you know that the amount of water on Earth now is about the same as when the dinosaurs lived on our planet. How is that possible?
The answer is that invisible water vapour in the air cools and condenses to form drops of water. The reverse process takes place when water evaporates. When the water evaporates, it can not be seen anymore as it has become a gas called water vapour. This process of water always changing from a liquid to a gas and back again is an ongoing process. It is called the water cycle and this is why the amount of water on Earth stays the same.
In a cycle, a set of events (things that happen) keep on repeating in the same order.
The water cycle refers to how water changes from one state to another in a cycle. It takes place in our whole world.
Get your learners to first discuss the picture below showing the water cycle before the facts are given.
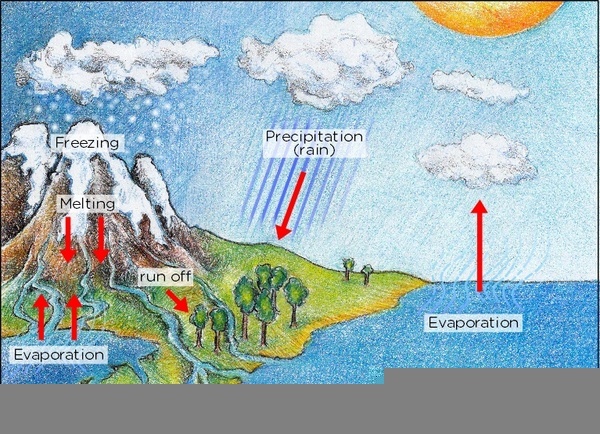
Let's look at the stages in the water cycle:
Look at the image again which shows the water cycle. Use the picture to explain the water cycle to your partner and see if you understand all the processes.
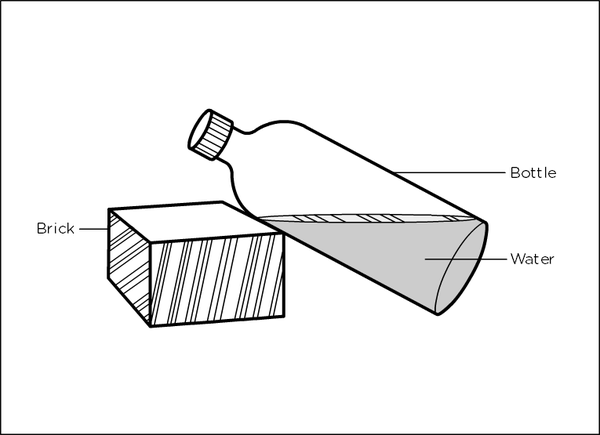
Let's make a model to help explain the water cycle. Models are very important in science as they help to show an important process or concept in real life. A model is something we build to represent or explain what happens in real life.
The following activity involves making a model of the water cycle. Models are very important in science as they help to demonstrate a concept or process. Explain to the learners that different parts of the model will represent actual things in real life. For example, the water in the bottom of the bottle will represent the ocean. At the end of the activity the learners will need to answer what each part of the model represents so make sure to give hints and suggestions as you are making the model. It would be best to do this as a group activity. Make sure that it is a hot day and that you leave the bottles in the sun for long enough that there is evaporation and condensation in the bottle. An idea is to leave the bottle outside whilst carrying on with the rest of the lesson.
MATERIALS (What you will need):
INSTRUCTIONS (What you have to do):
QUESTIONS:
Which part of the model is like the sea?
The water in the bottom
Which part is like rain falling?
The water condensing on the side of the bottle
Which part is like the river flowing back to the sea?
The droplets running back down to the water along the side of the bottle
What do we call the process where water turns into water vapour (a gas)?
Evaporation
Can you see how the water in the bottle is going through a cycle? Write down the cycle below.
Water as a liquid - evaporation - condensation - water as a liquid
Now that we have seen a model of the water cycle, let's try drawing it.
INSTRUCTIONS:
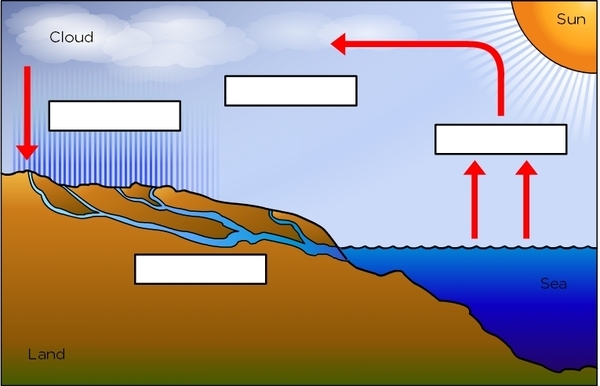
Use the water cycle to explain in your own words how rain is formed. Write your answer below.
List the three states of matter.
Solid, liquid, gas
Describe what happens to solid ice when it is heated.
The temperature rises causing the ice (solid) to melt.
|
1. Has a definite shape and takes up a definite space on the surface |
A. Liquid |
|
2. Has no definite shape and spreads in the space |
B. Solid |
|
3. Has no definite shape and takes the shape of a container |
C. Gas |
Answers:
1: B. Solid
2: C. Gas
3: A: Liquid
What will happen to the water in a saucer if we leave it in the sun for four hours on a very hot day?
It will evaporate.
Explain why water droplets form on the outside of a cold cool drink can?
The water vapour in the air touches the side of the cold cool drink and also cools down. This causes it to condense on the side of the can and form water droplets.
A block of ice, a brick, and a marshmallow are left in the sun next to each other on a hot day. Discuss what changes you would observe in the objects after three hours.
The block of ice will melt and become a liquid very quickly. The brick will warm up but will not melt. The marshmellow will probably begin to melt, but not as quickly as the ice.
What is the reverse of freezing?
Melting
Do you think ice or chocolate will melt quicker if they are both left outside in the sun on a hot day?
Ice