


Could you lift the bucket by turning the broom handle with your hands?
Yes
Have you ever looked underneath a car? It looks very complicated and there are all sorts of pieces and parts, each with their own job to do. We are going to focus on two of the main parts in a vehicle which allow it to move.
There is no specified Technology Design Process in this chapter, but the focus is on Technology and systems. In Gr. 6 in Earth and Beyond, learners will follow a Design Process and design and make a car to move on the Moon or Mars. They will revise some of the concepts that they learnt here about wheels and axles.
All vehicles have wheels. Most cars have 4 wheels, while some have only 3 wheels, and yet others have many more. Trucks and buses have many wheels while some trailers or bicycles only have 2 wheels.
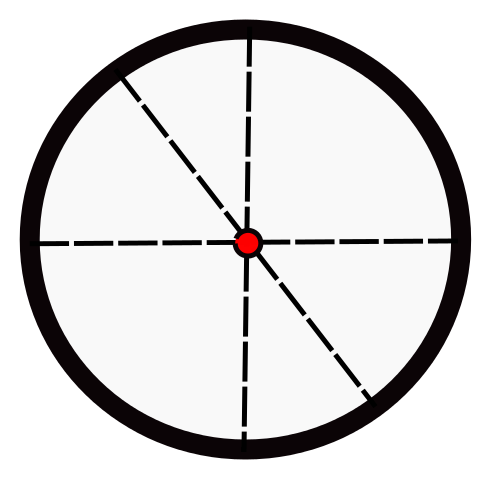
Why do you think wheels are round? Why will a square or a triangular wheel not work?
Wheels need to be round in order to roll. A square or triangle wheel will not roll.
In the past, before the wheel was invented, it was very difficult to move things around. People would try to drag heaving objects along the ground using ropes, or else they had to carry things, but this was very inefficient! As a result, people started to experiment with ways of making it easier to transport goods and heavy objects.
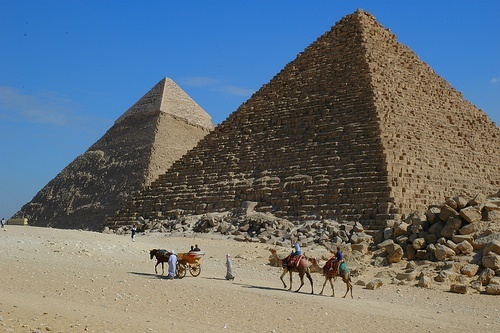
The pyramids in Egypt were built long before modern transport (including trucks) was invented.
The Egyptians were very clever in finding ways to move very heavy objects. They used logs that were laid down like in the picture. The heavy objects were placed on them, rolling them creating movement like in the picture.
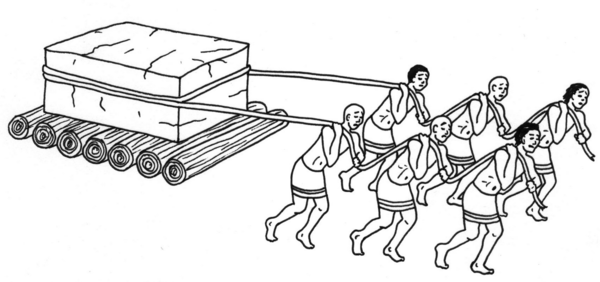
You can demonstrate this by using pencils and placing a bunch of pencils next to each other. Then put a heavy object on top of the pencils and push it along. As the object moves the pencils underneath it move too.
The Egyptians used this method to move the massive blocks of stone to build their pyramids. But, there were still many problems with using logs cut from trees.
Can you think of any problems of using logs to try move very heavy objects? Discuss with your friends around you and write your answers below.
Logs not of the same size or length. Needed a lot of logs and then had to move logs as well.
This can be demonstrated by using different shapes and sizes of pencils and pens.
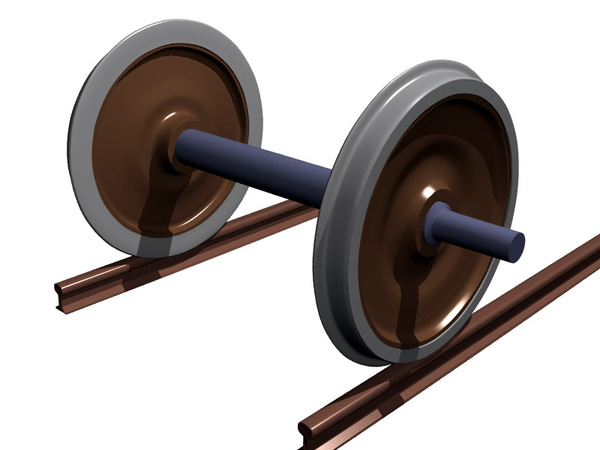
Later on, people started to cut the logs into short pieces so that they were the same size. Each piece was like a wooden disc. The wooden disc could not stand up by itself so people attached a wooden pole between two of the wooden discs. The wooden pole was the first axle, and we still use axles to this day. That is how the first wheel and axle was developed!
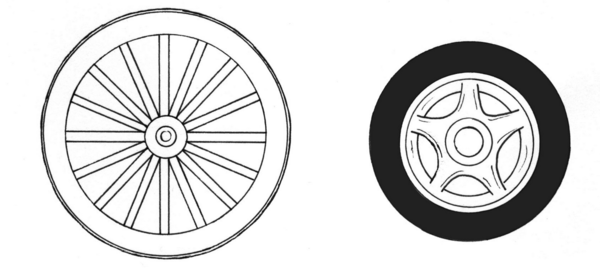
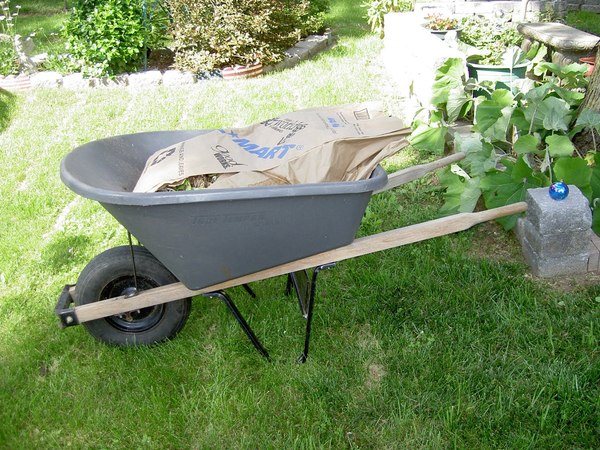
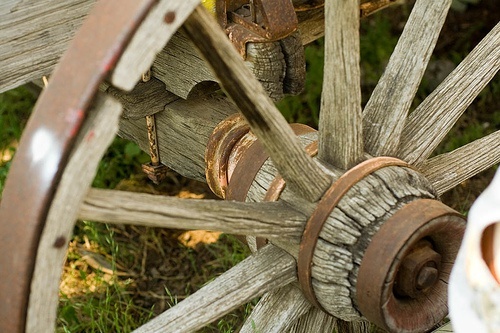
People could then balance goods on the axle and use this simple machine to pull or push objects along. However, this wooden disc wheel was still very heavy! To make it lighter, the wheel was changed to a round frame with spokes, like a wagon wheel. This made it much lighter and easier to move. Since then, the wheel has advanced a lot. Think of the shiny metal and rubber wheels you see on cars today!
Humans have built many machines to help make their tasks easier. A wheel and axle is a simple machine. It makes it easier to move a load; to transport things and people.
A wheel and axle is made up of a wheel (large cylinder) joined onto an axle (which is a small cylinder).
When we think of wheels and axles, we think of cars and other vehicles that we see all around us that have wheels.
However, there are many examples of objects and machines that use wheels and axles:
Find pictures of three of the above examples. Look in old magazines and newspapers at home, or on the internet for pictures. Paste the pictures in below and label the axle and the wheel in each picture.
A door knob has a large cylinder on the outside, attached to a small cylinder on the inside. It is easier to turn the large cylinder than the small cylinder with your hands.
Let's make a simple wheel and axle mechanism to understand how it works.
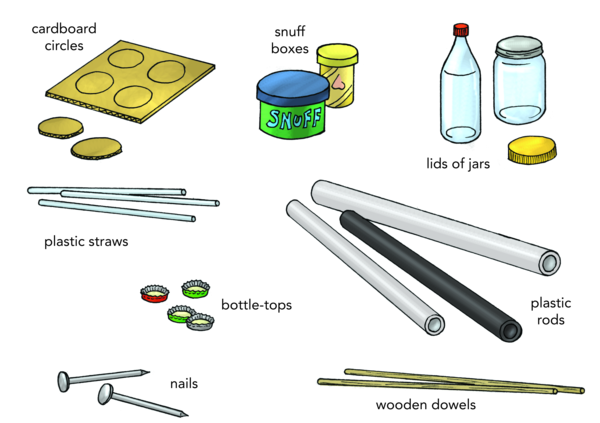
MATERIALS:
INSTRUCTIONS:
QUESTIONS:
Could you lift the bucket by turning the broom handle with your hands?
Yes
Was it easier to lift the bucket when you turned the broom handle using the ruler?
Yes
Replace the ruler with a stick that is longer than the ruler and use the stick to turn the broom. Was it easier to lift the bucket using the long stick?
Yes, the longer the ruler or stick the easier it was to lift the bucket.
Identify the axle in the setup.
The broom handle is the axle.
Identify the wheel in the setup.
The ruler or long stick is the wheel.
We could lift the bucket by turning the broom handle. It was much easier to lift the bucket when we used the ruler. Our hand had to move further when we used the ruler, but it was easier and the bucket felt lighter. We made a simple wheel and axle machine to make it easier to lift the bucket.
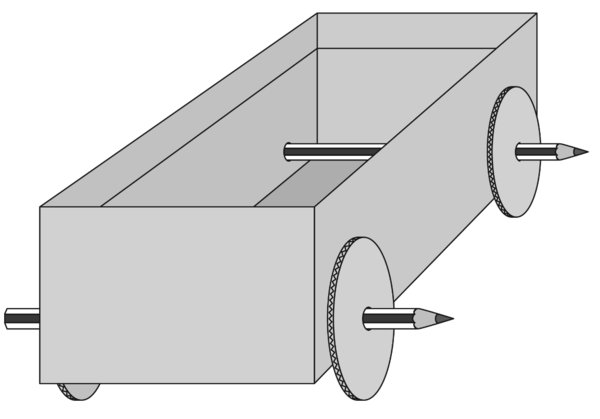
Now, let's put two axles and four wheels together to make a simple tractor!
MATERIALS:
INSTRUCTIONS:
QUESTIONS:
Can you see the wheels turning on the axle and how the axles connect the wheels?
Yes
Which part of the vehicle that you made is the axle?
The pencils are the axles.
This section shows different ways of making wheels and axles using materials which are easily obtainable. First go through some of the ways to make wheels and axles, and finally the last activity is to experiment with different materials and evaluate which set ups work best.
We are now going to experiment with different ways of making wheels and axles and finding out the best materials to use.
There are two ways to let wheels turn on an axle. One way is to have the axle fixed to the body, and the wheels are free to turn on the axle. The other way is to have the wheels fixed to the axle and the axle turns in a bigger tube called the bearing. The bearing is the hollow tube that the axle goes through. The bearing must be bigger than the axle so that the axle can turn easily.
You can use plastic straws or the barrel of an old ball-point pen to make a bearing for an axle. The picture shows you two ways to fix the bearings onto the body.
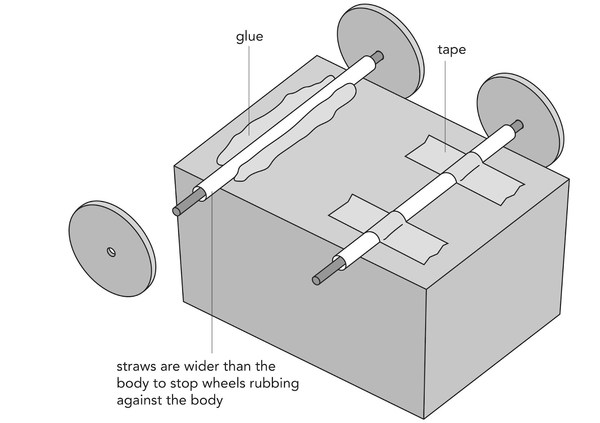
What are the two ways used in the picture to fix the bearing onto the body.
tape and glue
What are some materials that you could use to make the axle in the above picture?
Smaller straws, dowel sticks, sosatie sticks, etc.
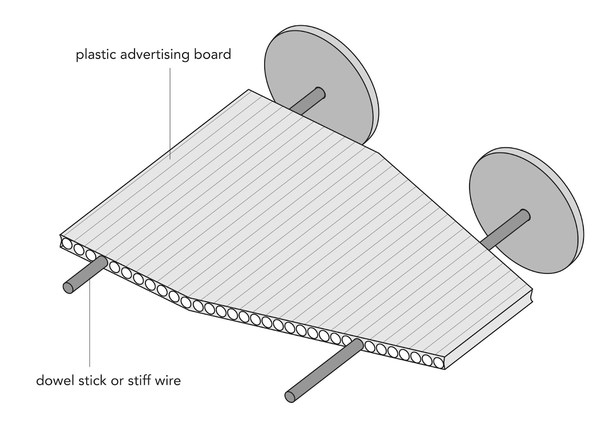
You can also use plastic sign-board or strong corrugated cardboard to make a body with wheels. Can you see how the axle goes through the holes in the cardboard?
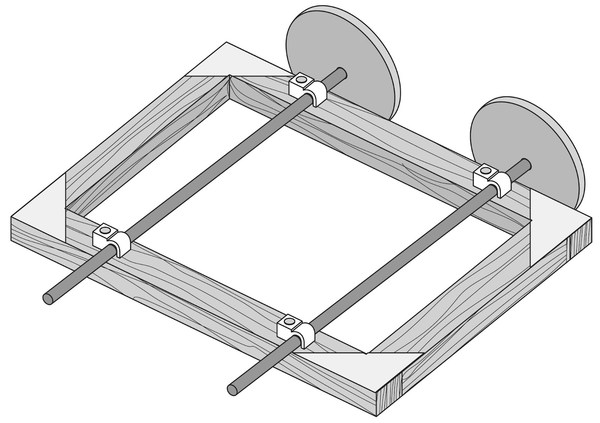
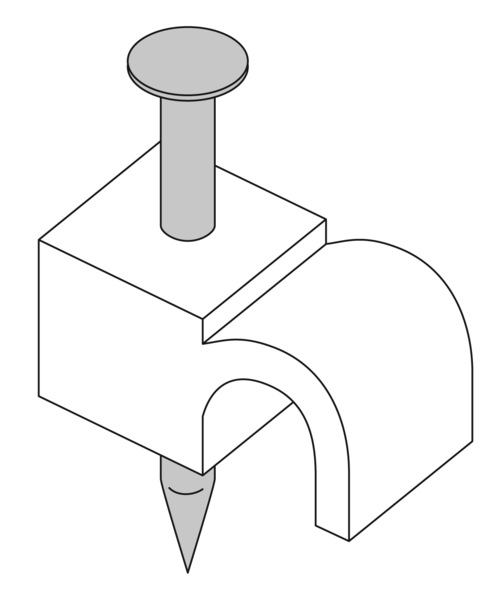
The next picture shows you the other way to let the wheels turn. This time the axle remains fixed and the wheels turn on the axle. The axle is fastened to a wooden body with cable clips. Cable clips fasten telephone cables to walls. Can you see the blown up version of a cable clip? The clips may hold the axle tightly, so the wheels must be free to rotate.
This activity does not follow a Technology Design process with all the steps, but does involve investigating, making and evaluating different objects to make wheels and axles and then using their best option to make an improved tractor from what they first made in the beginning of this chapter.. Ask learners to collect the materials for wheels and axles from home beforehand - tell them to also use their imaginations when looking for different materials to use. You will also need to supply some of the materials below.
MATERIALS:
INSTRUCTIONS:
Set up a mini competition to see whose tractor can go the furthest after giving it one push and it is carrying an object (such as the board duster, or some other small, fairly light object). Use a tape measure to record how far each learner's tractor went.
QUESTIONS:
Make a drawing of your final design for your improved tractor below. Remember to label the different materials that you used.
Which material did you decide was the best to use for the wheels and why?
Learner dependent answer. Make sure they provide a reason for the chosen material.
What did you decide to use for the axles and why?
Learner dependent answer. Make sure they provide a reason for the chosen material.
How did you attach the wheels to the axle in your final design?
Learner dependent answer
How far could your tractor travel (while carrying an object) after you gave it a push?
Learner dependent answer
How would you improve your design if you had to do it again?
This is a learner dependent answer but the teacher needs to check that learners evaluate their designs.
Car, truck, bicycle, pram, motor bike, trolley, etc.
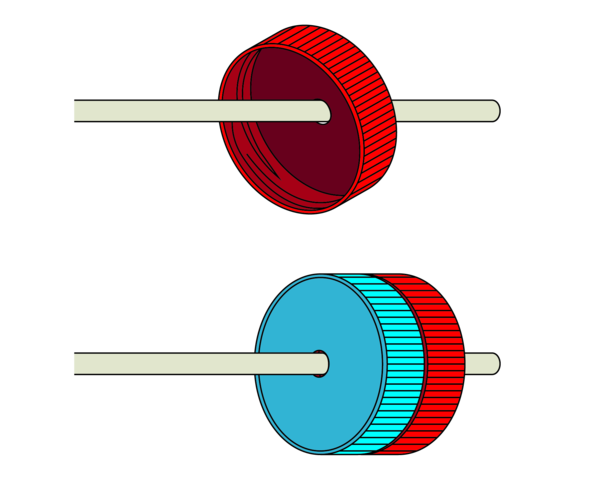
Jojo did this because one lid was probably unstable and wobbled, whereas two lids are more stable and do not wobble.
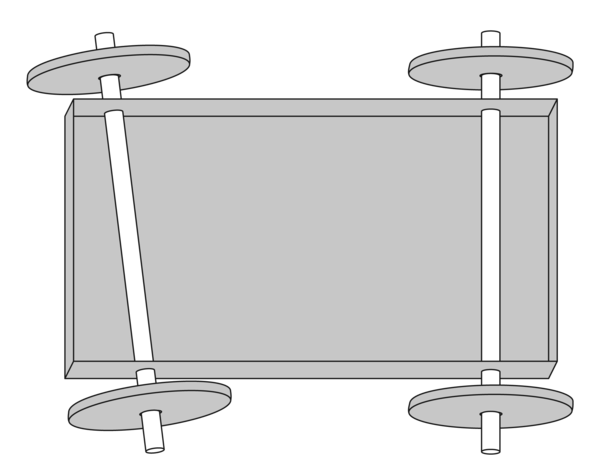
What is wrong with these axles and how do you think the tractor will move? What should Jojo do to improve his design?
The one axle is skew which will make the tractor move in a curve to the one side. He should improve the design by making the axles parallel to each other and perpendicular to the side of the tractor. (Perhaps explain the words parallel and perpendicular to your class by drawing pictures on the board)
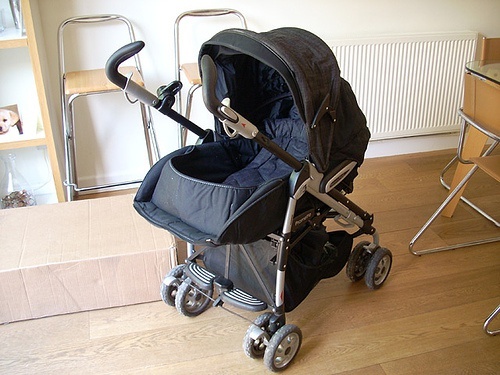

When do you think it would be best to use a pram with small wheels and when would a pram with big wheels be used?
Small wheels - over smooth ground, in homes, shops, etc. Big wheels - over rougher ground, to move more easily, go faster

That's all for Energy and Change!
I hope you enjoyed it. I sure did!