


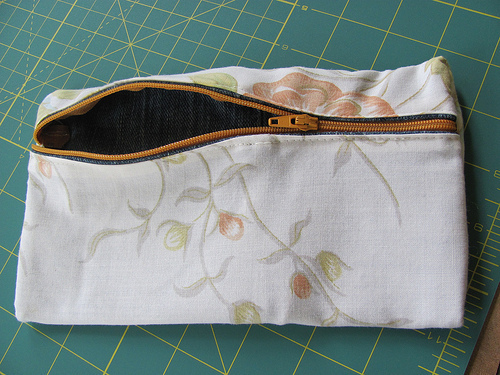
What is this object called and what is it used for?
A pencil bag is used for keeping your stationery in.
In the previous chapter, we looked at materials all around us and how they can be either a solid, a liquid or a gas. Now we are going to look more closely at solid materials.
In CAPS, this section has been allocated two weeks (7 hours), however, more time might be needed, possibly three weeks. The next chapter on "Strengthening Materials" could possibly take a shorter amount of time than two weeks, possibly one week. So, a suggestion is to spend more time on this chapter and a bit less time on the next chapter ("Strengthening materials"). there are also some activities in this chapter on flexibility which could be repetitive and so if you do not have time to do all of them, then just choose one.
Almost everything around us is made of materials. The shoes you wear, the pen you write with, the glass you drink out of, cellphones, a soccer ball, all your toys, the chair you sit on are all made of materials.
INSTRUCTIONS:
QUESTIONS:
What is this object called and what is it used for?
A pencil bag is used for keeping your stationery in.
What material is the object made of?
Fabric
Do you think this is a good material for this object? Give a reason for your answer.
Learner dependent answer - check their ability to provide a viable reason to justify their answer.
Can you suggest another type of material that can be used to make this object? Do you think this material will work better? Give a reason for your answer.
Learner dependent answer - a possible material to make it from is plastic, which might be stronger for example.
The object has a zip. What is the function of the zip?
To open and close the bag
What material is the zip made from? Do you think this is a good choice of material? Give a reason for your answer.
The zip is made of metal. It is a good choice of material as metal is strong and will not break when you are constantly opening and closing the zip. Assess what the learners says and if they provide any other reasons.
In the previous activity, you should have learnt that:
In the next section we are going to see how some materials are used to make new objects. We are also going to look at why some materials are better to use for making certain objects.
Every day we use different products made from different materials. The chair you are sitting on is made of a material called wood or plastic. Wood is from a tree. Wood comes from a natural resource. It can be used as a raw material by humans to make furniture.
Where have you heard the word "raw" before? Perhaps it was when someone was talking about your food and they said the meat or vegetables were still raw as they had not been cooked yet. When we talk about raw food, it means the food has not been processed by cooking. When we process something we do something to it to turn it into something else with different properties.
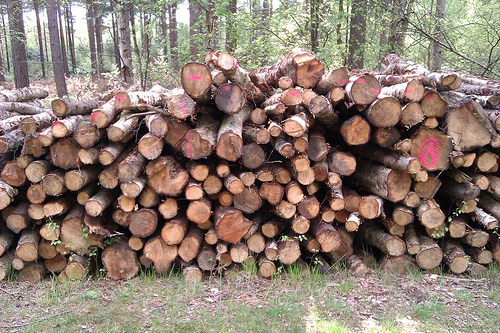
We can also talk about raw materials. This is when the material is in its natural state. It has not been processed yet. We find raw materials in the environment around us, such as the trees in a forest, or coal and oil underground. But, when this raw material has been processed, meaning humans have changed it, then we call it a manufactured material.
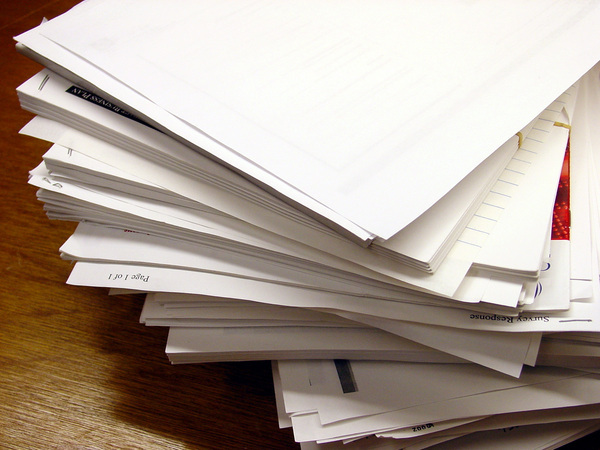
Examples of a raw materials are wood and plant fibre. Once wood and fibre have been processed, humans make it into paper. Paper is a manufactured material.
Sheep are farmed for their wool. Wool is a raw material, but it is processed to make a manufactured material. What things are made from wool?
Fabric, jerseys, scarves, socks, beanies, gloves, etc
Raw materials in our environment are used to make other materials which are very useful. Let's look at some.
Look at the pictures in the following activity which show the raw material and the manufactured material that is made from each. Raw and manufactured materials have different properties.
Photos are provided but it would be best if you could bring some of the actual materials into class, such as wet clay and a fired clay pot.
INSTRUCTIONS:
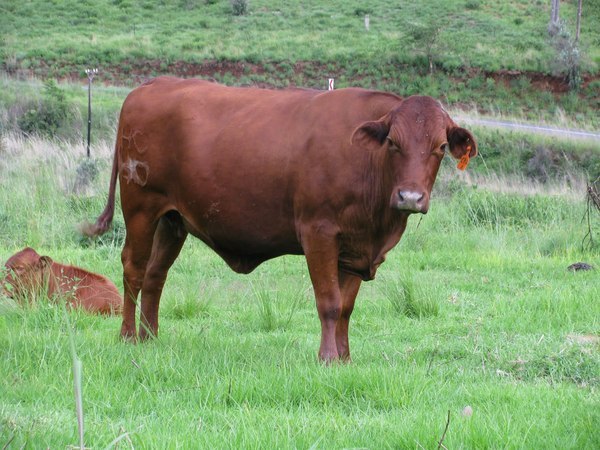 Animal skin (hide) is used to make leather. |
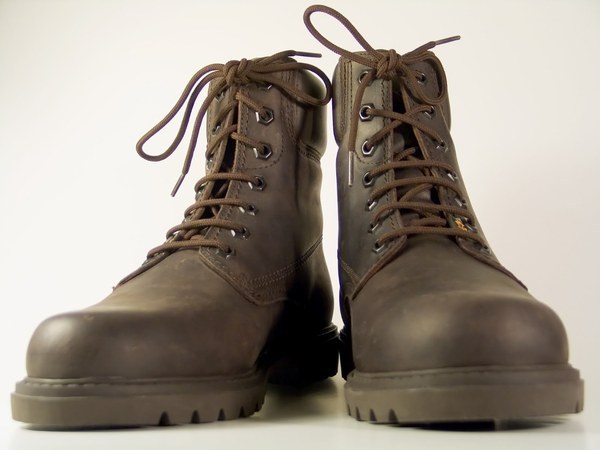 Boots made from leather. |
|
Describe the properties of the cow hide: |
Describe the properties of the leather: |
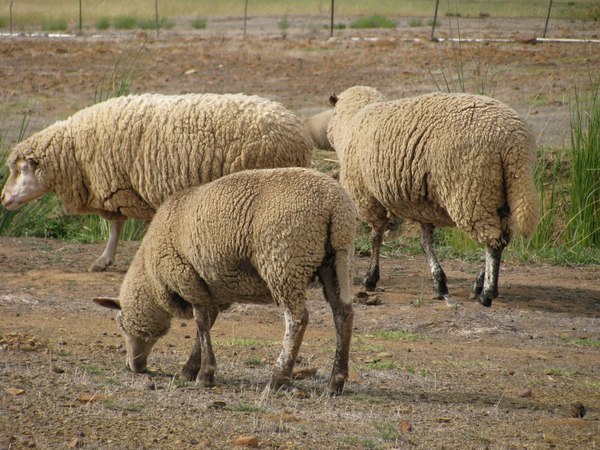 Wool from sheep is used to make to make clothes. |
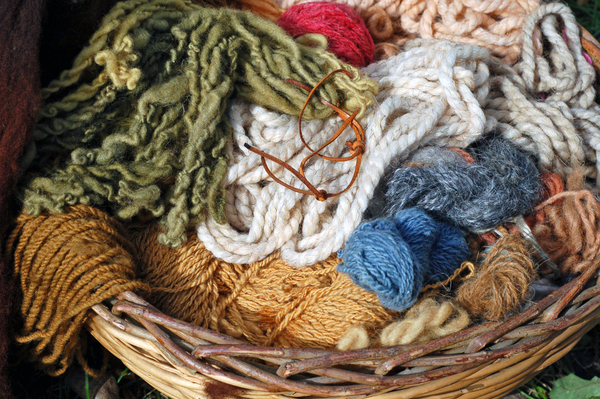 Wool is spun to make strings and dyed to make it colourful and will be made into clothes by knitting. |
|
Describe the properties of the sheep wool: |
Describe the properties of the processed wool: |
 Clay being moulded into a pot.http://www.flickr.com/photos/kellinahandbasket/2183799236/ |
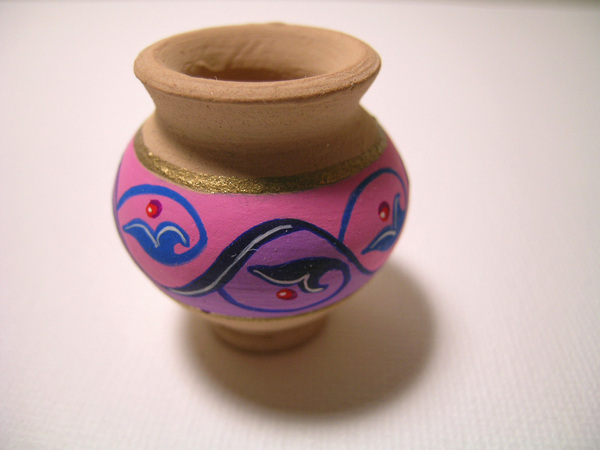 A pot made from clay which has been painted |
|
Describe the properties of the clay: |
Describe the properties of the ceramic pot: |
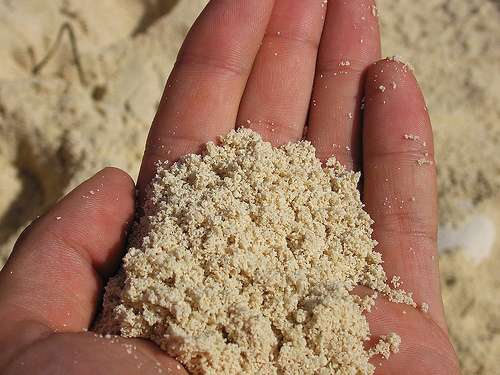 Sand is used to make glass. http://www.flickr.com/photos/sroown/797820971/ |
 Glass is made from \(\text{70}\)% sand which has been heated to very high temperatures. |
|
Describe the properties of the sand: |
Describe the properties of the glass: |
We know that materials are used to make different objects. You have now learned that some materials are called raw or natural materials and some are called manufactured or man-made materials. We can group matter according to how it is used. This grouping of matter is called classifying.
INSTRUCTIONS:
|
Object |
Raw material |
Manufactured material |
|
Watermelon 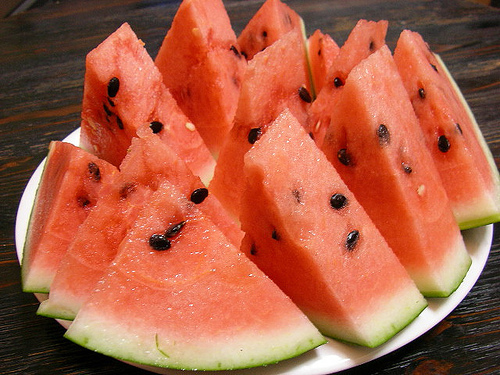 http://www.flickr.com/photos/jetalone/201784099/
|
tick |
|
|
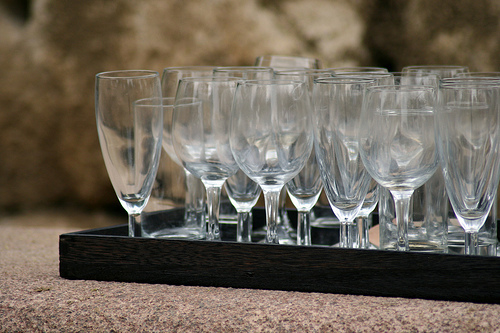
Glass 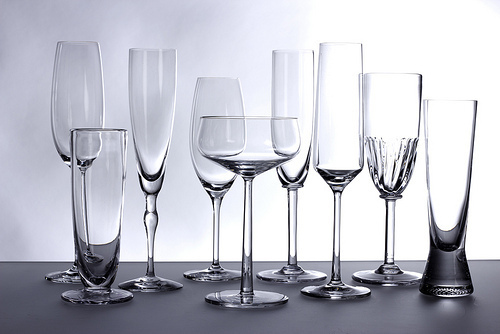 |
tick |
|
|
Feathers 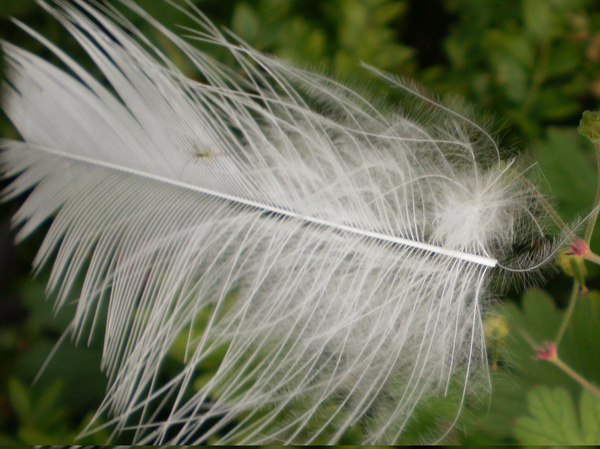 |
tick |
|
|
Coins 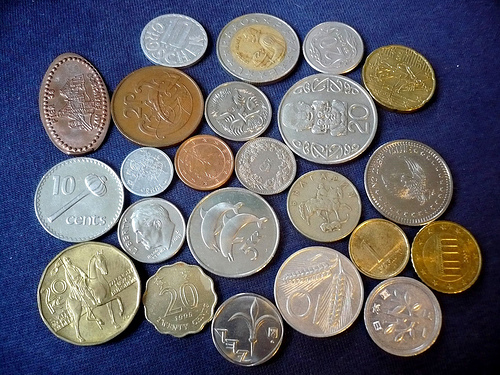 |
tick |
|
|
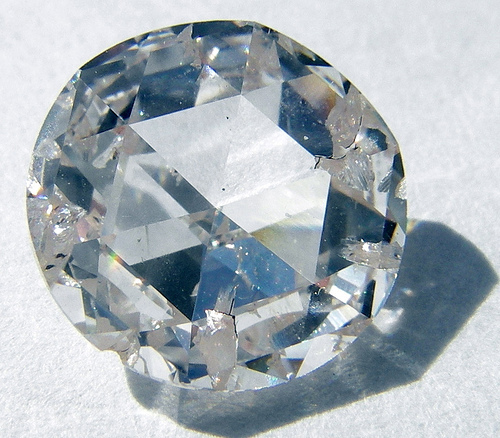
Diamond  |
Tick (tricky as this diamond has been polished and cut to look like this, but diamonds do occur naturally) |
|
|
Pot made of clay http://www.flickr.com/photos/aloha75/6086355519/ 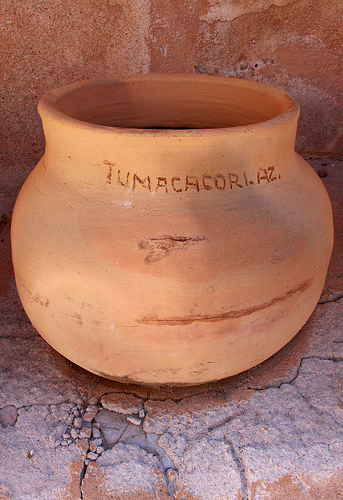 |
tick |
|
|
Plastic bag 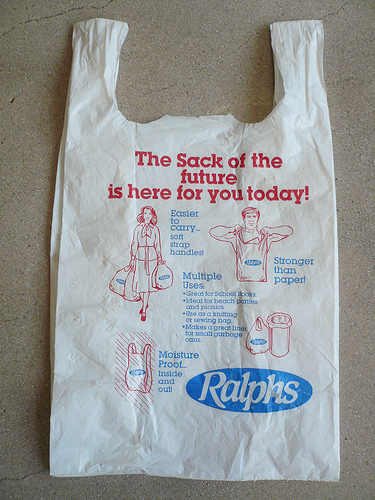 |
tick |
|
|
Wood
 http://www.flickr.com/photos/tuchodi/5040332553/
|
tick |
|
|
Sand  |
tick |
Introduce the topic by highlighting the role paper plays in everyday life. Let the learners list objects made of paper. How do they feel about framed photos of loved ones? Ask them where paper comes from. Let them read the story below and then answer the questions.
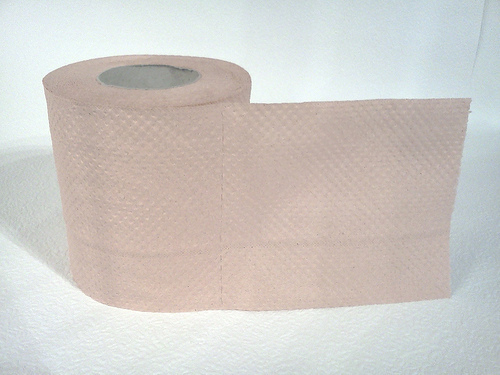
Can you imagine a world without paper? There would be no books, newspapers, magazines or even a sheet of music when you want to play piano. No paper means no more paper food labels or paper packaging. Not even toilet paper or kitchen wipes.

Paper is a very important material in our lives today. Let's find out how paper is made.
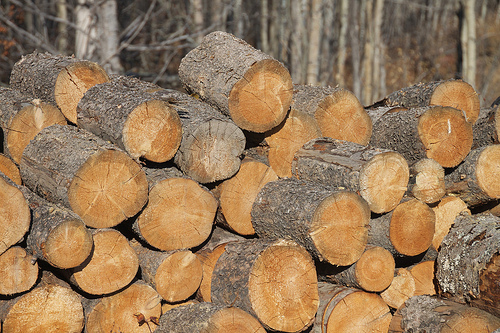
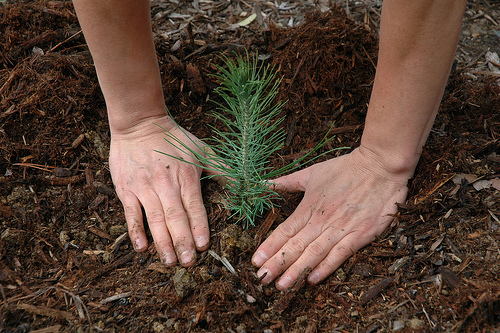
Paper is made from the wood and plant fibre from trees growing in plantations all over the world.
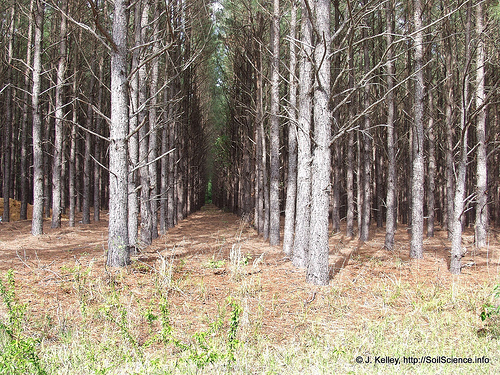
What raw material is used to make paper?
Plant fibre
You can supplement the following activity with other resources from paper mills such as Sappi and Mondi which will have brochures for children about the papermaking process.
Afield trip with the Thunderbolt Kids!
The Thunderbolt Kids had just been learning about paper in their class. Tom wanted to know more about how plant fibres from trees are actually made into paper. So, the Thunderbolt Kids decided to visit a paper mill to learn more about the life cycle of making paper.
They were each given a diagram to help explain the papermaking process. You have also been given a copy of the diagram. The processes that take place at each stage were explained to the Thunderbolt Kids at the mill and Tom wrote down his notes. You will see his notes below for each stage - make sure you read these too!
Learners generally struggle with a flow diagram - the concept that one thing happens after the other. Teachers need to explain this concept carefully and show learners that a flow diagram lays out all the steps in a process in the order that they happen in. Perhaps, first just get learners to look at the flow diagram whilst you go through the accompanying notes, and then they can read the notes themselves and match each note to the picture it is describing.
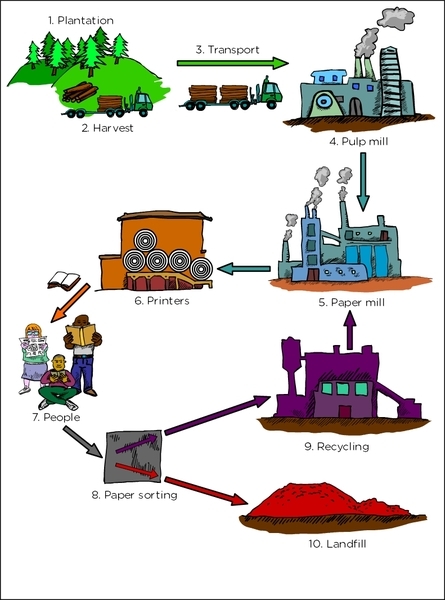
Tom's Notes:

Plantation
Harvest
Transport
Pulp mill
Paper mill
Printers
People
Paper sorting
Recycling
Landfill
After the field trip, Sophie was really interested in how she could set up recycling at their school to help reduce their impact on the environment. Farrah showed her arty side when she made some earrings and a cover for her notebook from recycled paper. Jojo was just happy that he had his favourite sports magazine to read, which is made from paper. And Tom was really happy that he got to learn more about the papermaking process.
INSTRUCTIONS:
QUESTIONS:
What are some of the final products that paper can be made into?
Books, newspapers, magazines, billboards, toilet paper
Which type (species) of tree is mostly used to make paper?
Eucalyptus (gum trees) and pine trees
What is pulp made of?
Plant fibre and water
What does "debarked" mean?
It means the bark is removed from the logs.
What is a landfill site?
It is where the rubbish is dumped in big areas.
A. Chips go into the pulp mill.
B. Wood logs are transported by trucks.
C. Pulp flows to the paper mill.
D. Paper is transported to buyers who make other paper products.
E. The pressed and dried pulp is rolled or cut into sheets as paper.
F. Wood is harvested from trees growing in a plantation.
G. Pulp is washed, bleached and cleaned and dried.
Answer: F, B, A, C, G, E, D
Talk to a partner about the section of the papermaking process that interested you most. Explain why you find it interesting.
Learner dependent answer
Do you think many people work in the papermaking industry? Explain your answer.
Many people are employed. There are job opportunities for workers in the forests at the paper mills to transporting products etc.
Do you think the papermaking process is a long or a short process. Give a reason for your answer.
It is a long process as there are many steps involved which all take time, especially the growing of the plantations as the trees take several years to grow to the right height.
Name 2 of the major papermaking companies in South Africa that you know of.
Sappi and Mondi
We mentioned recycling as a part of the papermaking process. Recycling is a very important process as it allows us to reduce our waste and use things over again. Not only paper can be recycled. You can also recycle glass, tin and plastic.
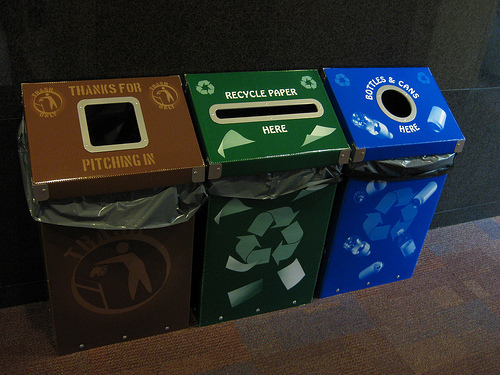
Is there a paper recycling project in your school or environment?
Yes/no
Why do you think we need to recycle paper?
Energy is saved to make new paper products when using recycled paper. Reduce the waste at the landfill sites which have a big environmental impact and destroy natural habitats.
Raw and manufactured materials have specific properties. We already looked at some of the properties of raw and manufactured materials by describing them. The properties of a material help determine how it is used. For example, plastic is waterproof so some rain jackets are made of plastic to keep the rain off and keep you dry. A rain jacket made from wool or fibre would not be waterproof and you would be soaked! This is because the wool is an absorbent material (it absorbs water).
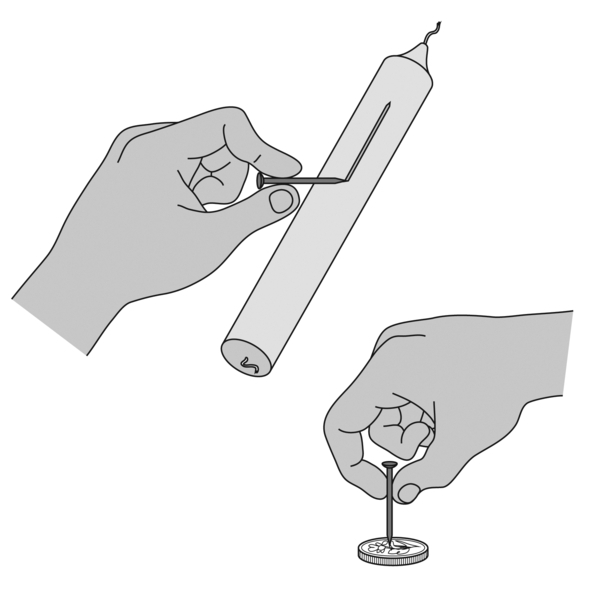
A material is described as hard when you cannot scratch it, you cannot cut it and you cannot dent it. Hardness measures how difficult or easy it is to change the shape of the material, either by denting, cutting or scratching it. A diamond is an example of a hard material as diamond cannot be scratched by other objects. In fact, diamond is so hard it is used in drill bits to drill through rocks and many other materials.
The opposite of hard is soft! Think of the wet, raw clay from the previous chapter. This clay is soft and can therefore be moulded into a new shape.
MATERIALS:
INSTRUCTIONS:
|
Material |
Prediction - can you scratch or dent the material? |
Scraping observations |
Denting observations |
|
Wax candle |
|||
|
Metal coin |
|||
|
Plastic rod |
QUESTIONS:
Which of the three materials is the hardest?
Which of the three materials is the softest?
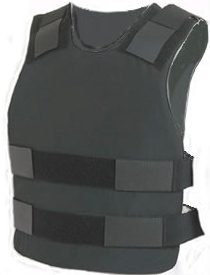
A material is tough if it is hard to break. Kevlar is used to make bullet resistant vests. This material makes it very difficult for bullets to go through.
If you hit a metal coin with a hammer, there will be no or little damage. If you hit a piece of chalk with a hammer it will break into pieces. The metal coin is tough compared to the chalk. The chalk is very fragile.
Toughness measures how much energy is needed to break a material. We will test some everyday materials to decide which material is the toughest.
You could use this scientific investigation to answer the question that you write on the board, learners then come up with a hypothesis, and you then present them with the apparatus and they try come up with the method themselves to test their hypothesis. Do not work from the workbooks. Then once learners have had a chance to design their own investigation, you can come back to the workbook.
AIM: To investigate how tough different materials are.
APPARATUS (Each group will need:)
METHOD (Each group will have to):
Setup:
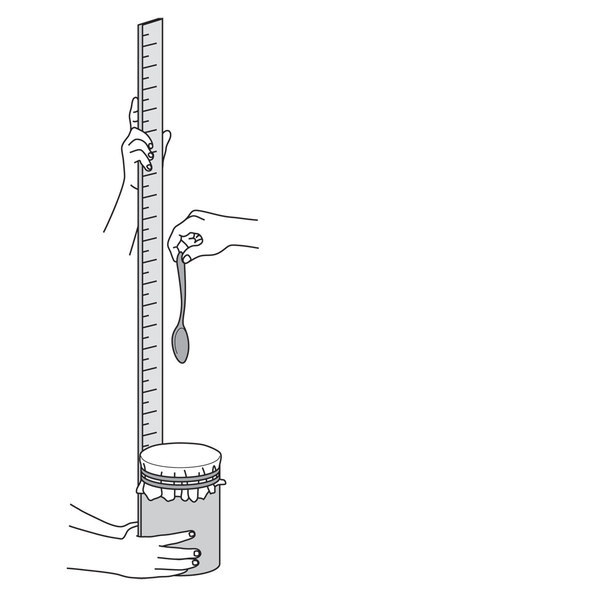
RESULTS AND OBSERVATIONS:
Record your measurements and observation in the table. :
|
Material |
Final drop height (cm) |
Observations |
|
newspaper |
||
|
photocopy paper |
||
|
tinfoil |
||
|
wax paper |
||
|
plastic wrap |
CONCLUSION (What you learnt):
The energy of the teaspoon when it hits the material depends on the height from which you dropped the teaspoon. The greater the height the greater the energy. The toughest material only broke with the teaspoon with the greatest energy.
Which material broke first and which material broke last?
Which material needed the least amount of energy to break?
Which material took in (absorbed) the most energy before breaking?
Which material was the toughest?
Energy will only be dealt with in Term 3, and these questions require learners to connect height when the plastic wrap breaks with energy. But this can be picked up again next term and provides a nice extension.
Stiffness and flexibility are ways of describing how an object behaves when a force is applied to it. A stiff material will not bend when you apply a force (push on it). But a flexible material will bend. When builders choose materials for building structures, sometimes they need flexible materials and other times they need stiff materials.
Fill in the table with your ideas of stiff or flexible materials and where they could be used. Look around your classroom or home and find 3 more materials which you must add in the empty lines and also classify.
|
Material |
Stiff or flexible |
Where would material be useful? |
|
rubber |
||
|
glass |
||
|
wood |
||
|
plastic material |
||
Case study: The flexibility of rulers
The Thunderbolt kids use rulers a lot in class. Their teacher likes them to use rulers to draw straight lines so that their work is neat. Tom needed a ruler as his was broken. Tom noticed that his was broken and so was Farrah's, but Sophie's and Jojo's rulers were not broken. Tom also observed that each of them had rulers made of different materials, either wood, plastic or metal. Tom thought that maybe the type of material that the ruler was made of might influence whether it would break or not. Tom asked his teacher if the material of the ruler made a difference to whether the ruler would break or not. Their teacher suggested that the whole class do an experiment to test the flexibility of the different rulers by doing a science investigation. Science investigations are used to answer questions!
Teacher note: When doing scientific investigations it is VERY IMPORTANT to not simply state the steps in the scientific method as learners will then just want to memorize the steps. Also, asking learners in a test to simply write down the steps in the scientific method does not add to their understanding of why we need them. They are simply recalling. Understanding why each step is needed and the logic of the steps comes with time and more practice. What we want learners to be able to do is ASK TESTABLE QUESTIONS, HYPOTHESISE and then DESIGN and CONDUCT EXPERIMENTS to test their hypotheses and thereby answer the question. The following questions will help learners come up with the question, hypothesis and prediction for the ruler investigation. You need not only use investigations which are outlined in these books, but actually TEACH learners how to go about doing an investigation. The procedures outlined in these workbooks will help, but rather do not use the book to follow a step by step procedure. Use it to guide your teaching in class while the learners' books are packed away and the learners have to come up with their own design and see how they can best conduct the experiment using the apparatus available. Refer to the books later to consolidate the investigation and record results. Each time you teach a different investigation you can also focus on a different aspect, such as asking the right investigative question, OR formulating an hypothesis, OR learning what variables are, OR representing data. Each of these skills will be emphasized in different ways in the different investigations, but only choose ONE to focus on at a time. This also will not all take place in one year, but the skills will be built up gradually over the years at school.
What did Tom observe?
Most learners had broken rulers.
What was the question he wanted to answer?
Which ruler is most flexible, a ruler made of wood, plastic or metal?
Why did the class do the experiment? This is the aim of the experiment.
To find out which ruler is most flexible.
What do you think the answer is to the question in number 2?
Dependent on learner.
Let us now try answer the question by doing a science investigation.
Which material is the most flexible for a ruler?
Teacher note: It is probably best to test the experiment yourself first to see if the 500g mass is sufficient to cause the rulers to bend. If not, you might need a bigger or smaller mass. Also, if you do not have a clamp, an alternative could be to rest a very heavy object on the end of the rulers such as some books or a pot plant.
APPARATUS (What you will need):
METHOD (What you have to do):
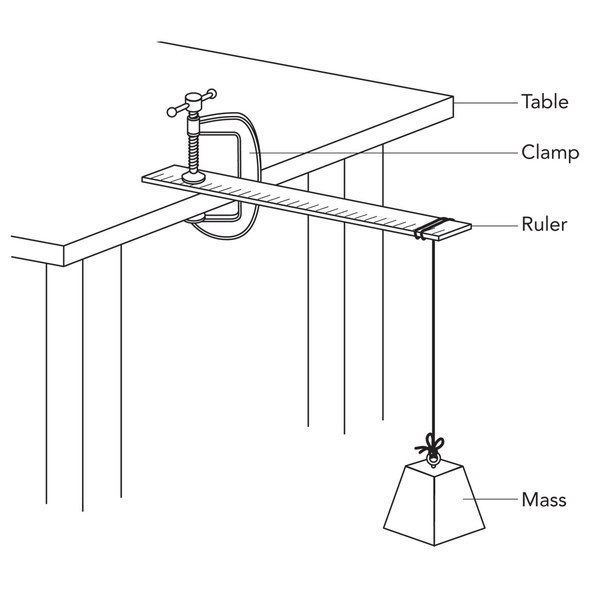
RESULTS (recording what you observed and found out):
|
Type of Ruler |
Distance moved down by the end (cm) |
|
a. |
|
|
b. |
|
|
c. |
Which type of ruler allowed the mass to move the furthest?
Which type of ruler allowed the mass to move the least distance?
If the mass is able to move down, then it means the ruler has to bend. We have said that the measure of how much something can bend is its flexibility. Which ruler do you think is the most flexible and why?
CONCLUSION (what you learned from the results):
What did you learn from this investigation? Provide an answer to your original question.
From your own conclusion, explain to Tom how you decided which ruler is most flexible.
The class was so excited after doing the experiment to advise Tom which ruler to buy, that they suggested doing another experiment to test how the most flexible ruler behaves when different masses are hung on to one end of it.
The next investigation follows on from the previous one. This shows how when you conduct a scientific investigation, more questions can come from it, which you can then attempt to answer again with another scientific investigation. If time does not permit you to do this investigation as well, you could leave it out, or possibly rather have a class discussion about how to design an experiment to answer this next question of how flexible one ruler is. However, this next investigation provides an opportunity to plot a graph so the focus of this investigation is to teach learners how to draw graphs.
APPARATUS (What you will need):
METHOD (What we have to do):
RESULTS (what you observed):
|
Mass (g) |
Distance dropped from start (cm) |
|
100 |
|
|
200 |
|
|
300 |
|
|
400 |
|
|
500 |
|
|
600 |
Use the results from your table to plot points on graph paper. We decided to change the mass hanging to the end of the ruler. With each mass the distance dropped changed. When plotting a graph the quantity we chose to change (in this experiment, we changed the the mass) is plotted on the x-axis.
Do not join the plotted points with a ruler. A smooth line drawn freehand through all the points is important
CONCLUSION (what you learned):
Which mass piece made the ruler bend the most?
The heaviest
Which mass piece made the ruler bend the least?
The lightest
What can you conclude about the distance the ruler moves (bends) and the mass that is hung from the end?
The heavier the mass the more the ruler will bend.
Further activities to investigate the properties of solid materials, such as light or heavy and waterproof or absorbent, is to bring some of these materials to school and let learners experiment with them in class. For example, bring some polystyrene balls and some marbles and some metal ball bearings which are all roughly the same size. let learners hold and play with them to see how they are very different in their weight although they may be similar sizes. You can put a bowl of water in front of the class and ask learners which balls they think will float and which will sink and then do the demonstration. (The polystyrene balls should float and the other two will sink). To investigate waterproof and absorbent, bring some sheets of these different materials to class, such as a dish cloth, a scarf, a piece of plastic (black bag or shopping bag), a piece of canvas, a piece of waterproof material to make jackets (if possible). Set up a demonstration in front of the class again and ask learners whether they think the piece of material will let a cup of water run through it (or if it will be able to soak up or dry some water on a saucer. Once they have answered you, do the demonstration to see if they are correct. You could get two learners to hold the piece of the material so that it makes a kind of cup or container and then you pour the water in. The rest of the class watches to see if any water comes out of the bottom and how much or how quickly. These kinds of activities will reinforce the idea of first asking a question, making a prediction and then testing it to see if your prediction was correct.
Teacher note: This is an EXTENSION and can be done if time permits or if you have some learners who are further along than others.
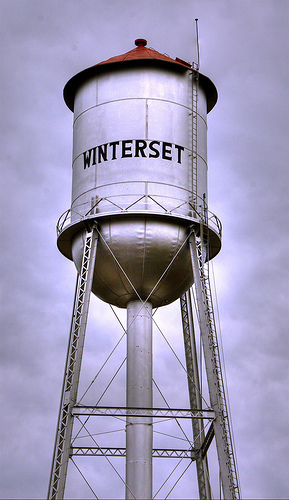
Some situations require that materials be strong in compression (be able to withstand pushing forces) and other situations where materials need to be strong in tension (be able to withstand pulling forces).
The vertical (upright) steel poles of the water tower that are supporting a great weight have to be strong in compression in order to hold up the weight of the water tank.
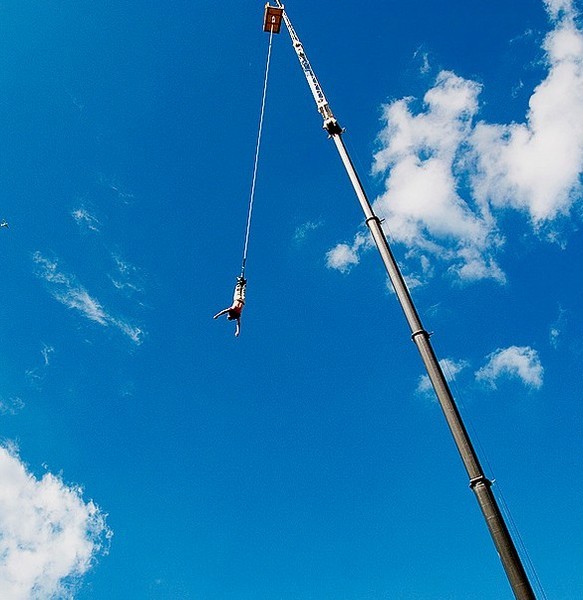
The rope supporting the bungee jumper needs to be strong in tension to ensure that the rope does not break and that the jumper survives his experience.
INSTRUCTIONS:
|
Scene |
Material that is strong in tension |
|
1. A person carrying a plastic shopping bag full of groceries http://www.flickr.com/photos/yourdon/4364551103/ 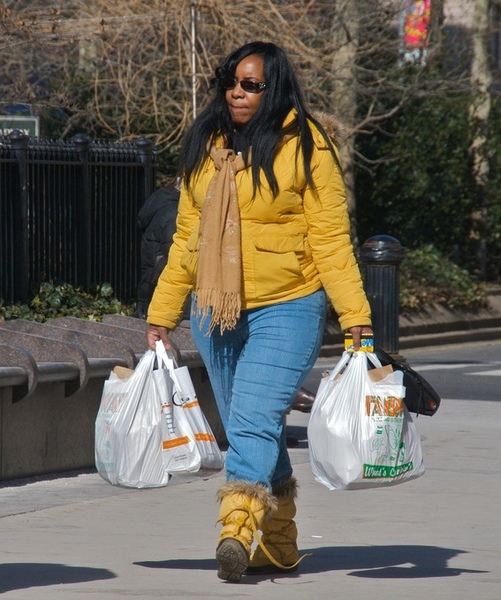
|
plastic |
|
2. A gymnast on a beam  |
wood or metal |
|
3. A child on a swing http://www.flickr.com/photos/digitizedchaos/4898296156/  |
steel chains |
|
4. The cable car on its way to the top of Table Mountain 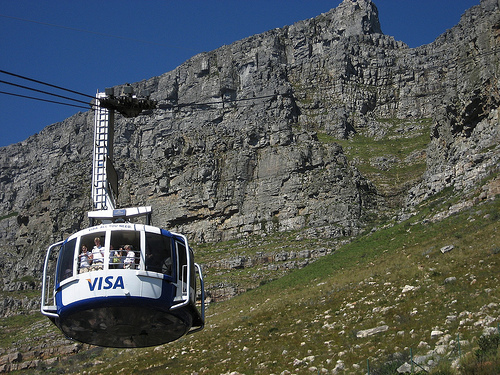 |
reinforced steel cable |
|
5. A parachutist falling under a parachute  |
synthetic rope |
When deciding which material to use, it is important to consider the type of material, the size of the material, the shape of the material and the forces the material will experience.
The use of the object determines the type of material it should be made of. Imagine a bicycle with wooden wheels. Do you think the wheels will turn and work as well as steel and rubber? Materials are chosen and used for the properties they have.
INSTRUCTIONS:
|
Chair |
Main materials used |
Where the material comes from |
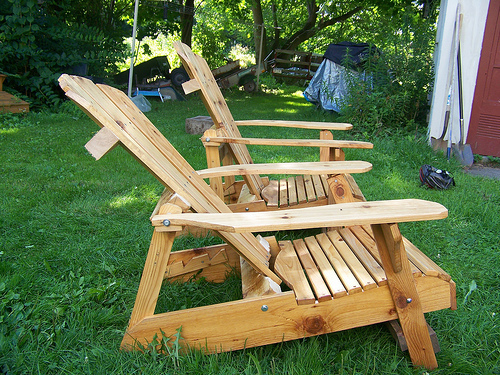 |
Wood |
From trees |
|
 http://www.flickr.com/photos/54400117@N03/5069063990/
|
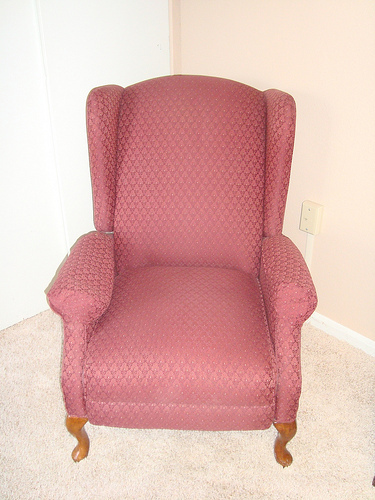
Fabric |
From cotton and wool |
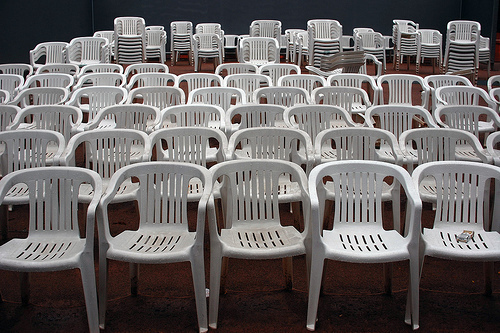 |
Plastic |
From coal and oil |
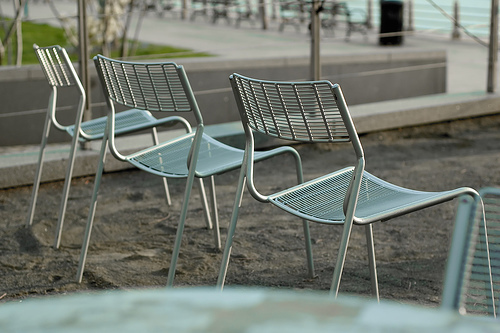 |
Metal |
From metal which has been mined and processed |
 |
Fabric and wood |
From trees and cotton plants |
Similar objects, such as balls used in sport, can be made from very different materials, depending on what the object is used for. Let's have a look in the next activity.
For the following activity, photos are supplied of the two balls, but it would be ideal for learners to touch and feel each ball. If you can obtain some of these balls, then bring them to your class. The underlying skill of this activity is to describe what you see, in other words, making observations and being able to write them down.
INSTRUCTIONS:
|
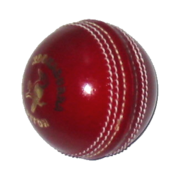
Ball A |
Ball B |
 |
 |
QUESTIONS:
What sports are these balls used for?
A: Tennis, B: Cricket
Each ball is made from a different material. What are these materials?
A: Tennis ball is hollow made from a layer of rubber on the inside and surrounding it is a softer felt-like material.
B: The cricket ball has a solid cork centre surrounded by hard leather and stitched with a thread.
Observe and then describe the properties of the material which is used in each ball.
Tennis ball - soft, "furry"/rough, can dent it (the rubber is flexible), light. Cricket ball - hard, heavier, smooth, shiny.
Why do you think the material was chosen for each ball?
The tennis ball needs to be soft and to be able to bounce as it is hit across the tennis court. The materials the ball is made of help it to do this. The red cricket ball is harder. The leather is smooth and hard and helps the ball to go fast and be hit far.
|
Raw material |
Manufactured material |
|
1. Sand |
A. Ceramics |
|
2. Clay |
B. Leather |
|
3. Coal and oil |
C. Glass |
|
4. Animal wool |
D. Paper |
|
5. Wood and plant fibre |
E. Plastic |
|
6. Animal hide |
F. Fabric |
1: C
2: A
3: E
4: F
5: D
6: B
What is the term used for a material which is not flexible?
Stiff
What is the term used for a material which is not waterproof?
Absorbent
Choose three materials that you would use to build a chicken run (an enclosed yard for keeping chickens). State at least two properties of each material and how those properties would help in making your chicken run to be safe from animals and weather elements. Use the space below to draw a table for your answers.
|
Materials |
Properties |
|
Wire mesh |
Flexibility, Toughness |
|
Wooden poles |
Stiffness, Strength in tension |
|
Zinc roof metal-sheets |
Hardness, Toughness |